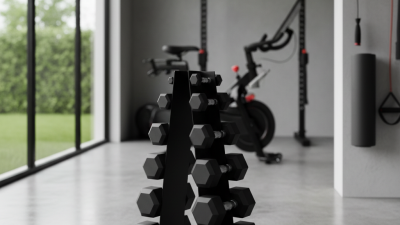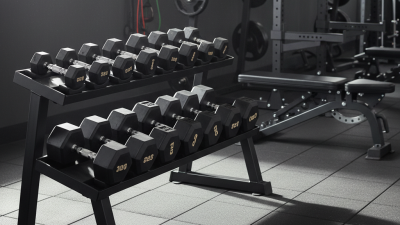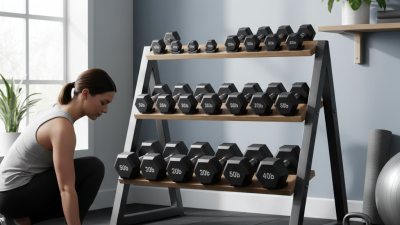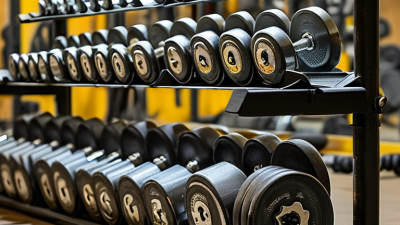
Choosing the right Dumbbell Rack is more than matching a room’s color scheme. It affects safety, workflow, storage capacity, and daily training quality. The Health & Fitness Association’s 2024 U.S. Health & Fitness Consumer Report recorded 72.9 million facility memberships in 2023, a 5.8% annual increase. More members mean more equipment movement, repeated handling, and greater pressure on storage systems.
A rack should fit the dumbbell collection, not merely the available corner. Measure the heaviest pair, handle spacing, rack depth, and walking clearance. Check the frame’s steel thickness, weld quality, weight capacity, finish, and anti-slip feet. A compact vertical rack may suit a small studio. A wide horizontal rack can offer faster access in a busy gym. It may also consume valuable floor space.
Think about real use.
Strength coach Dan John often says, “The goal is to keep the goal the goal.” That principle applies to equipment selection. If the goal is fast, safe training, decorative features should not outweigh stability and access. The American College of Sports Medicine continues to identify strength training as a central fitness practice, reinforcing the need for dependable equipment storage. Still, published capacity figures can be misunderstood. They may describe evenly distributed loads, not careless drops or uneven placement. That detail deserves attention.
This guide explains how to compare rack styles, dimensions, materials, safety features, and long-term value. The best Dumbbell Rack is not always the largest or cheapest. It is the one that remains stable, accessible, and practical after months of real training.
How to Choose the Right Dumbbell Rack?
A commercial dumbbell set from 5 to 150 lb needs more than basic storage. The total load can exceed 6,000 lb, depending on the number of pairs. Calculate the full set before choosing a rack. Include the dumbbells, rack, and possible user impact. A rack rated for light home use may fail under daily commercial traffic. Check its stated weight capacity and construction details. Steel thickness, welded joints, and stable feet matter. So does floor protection.
Rack shape should match the dumbbell range. A three-tier rack suits many 5–75 lb sets and keeps handles easy to reach. Heavier pairs from 80–150 lb need deeper cradles and stronger support. Measure the dumbbell heads, not only the handles. Some large heads can touch nearby pairs. Leave enough aisle space for users to lift safely without twisting. I have seen crowded racks become difficult to clean and harder to inspect. That small mistake affects both access and maintenance.
Tips: Count every pair and add a practical safety margin. Confirm each shelf’s capacity separately, not just the rack’s total rating. Choose rubber-lined supports to reduce noise and protect knurled handles. Anchor the rack when its height and location require extra stability. Inspect bolts, welds, and leveling feet each week. In practice, a slightly oversized rack often works better than a perfect calculation. Still, oversized does not mean careless.

Define dumbbell load requirements before selecting a commercial rack. A complete 5–150 lb set with 5 lb increments contains 30 pairs and weighs 4,650 lb in total.
The chart groups the set by dumbbell weight range and shows the combined load of each pair. The heaviest range, 105–150 lb, contributes 2,550 lb, so rack capacity, tray rating, floor loading, and available storage space should all be checked before installation.
A dumbbell rack should support more than the weight listed on its product page. Check its maximum rated load, intended use, and installation requirements. ASTM F2276 can provide a useful safety benchmark for fitness equipment, including stability and structural performance. Confirm that the specific rack has been evaluated against applicable requirements.
Calculate the total load before purchasing. Add every dumbbell stored on the rack, not only one side. A rack holding ten pairs of 30-kilogram dumbbells carries 600 kilograms of equipment. Allow extra capacity for repeated placement, accidental impacts, and uneven loading. Small details matter.
Do not replace a manufacturer rating with a general ASTM reference. The standard does not automatically certify every rack or storage arrangement. Request technical documents, test information, and clear capacity limits from the supplier. Check whether the rating assumes floor anchoring or another installation method. A free-standing rack may perform differently on rubber flooring, concrete, or an uneven surface.
Inspect welds, shelves, fasteners, and contact points during setup. Look for movement after loading each section. I would rather choose a rack with unused capacity than rely on a perfect calculation. That judgment is not always convenient. It may also need revision when heavier dumbbells are added later. Recheck the rack periodically, especially after relocation or visible damage.
How to Choose the Right Dumbbell Rack?
Measure the floor before comparing rack styles. The American College of Sports Medicine’s Health/Fitness Facility Standards and Guidelines recommends 36-inch aisles around fitness equipment. Treat this as a working minimum, not a decorative number. Measure from the rack’s widest point, including handles, feet, and loaded dumbbells. A 48-inch rack placed against a wall may need roughly 84 inches of practical depth. That calculation includes the rack and one clear 36-inch passage.
Use painter’s tape to mark the footprint. Walk through it while carrying a dumbbell. Awkward turns reveal problems that a floor plan can hide. The aisle should remain open when users select weights, replace them, or pass behind another person. ACSM’s facility guidance also emphasizes safe circulation and equipment spacing, supporting a layout based on movement rather than storage capacity alone.
Industry planning reports show why this matters. The 2024 Global Wellness Economy Monitor valued the global wellness economy at 6.3 trillion dollars in 2023, reflecting continued investment in exercise spaces. More equipment does not automatically create a better room. A crowded rack can slow traffic and increase contact risks. I have found that leaving extra clearance often works better than using every available inch. Still, 36 inches may not suit every user or local accessibility requirement. Check building codes, door swings, and emergency routes before installation. Measure twice. Buy once.
| Planning Dimension | Recommended Measurement | How to Calculate It | Example for a Single Rack | Why It Matters |
|---|---|---|---|---|
| Minimum aisle width | 36 in (91.4 cm) | Keep at least 36 inches of unobstructed walking space beside the rack and along the main circulation route. | A rack placed against a wall should have a minimum 36-inch clear aisle in front of it. | Supports safer movement, equipment access, and traffic flow in a strength-training area. |
| Rack footprint length | Measure the rack from end to end | Required length = rack length + side clearance | For a 48-inch rack with no side passage: 48 in of wall space, plus the required front aisle. | Prevents the rack from blocking adjacent equipment or walkways. |
| Rack footprint depth | Measure from the rear to the furthest front point | Required depth = rack depth + 36 in aisle | For a 24-inch-deep rack: 24 + 36 = 60 in (152.4 cm). | Provides enough room for users to select and return dumbbells without standing in the circulation path. |
| Recommended front working zone | 36 in minimum clear space | Measure from the rack’s front edge to the nearest fixed obstruction, such as a wall, column, or machine. | If the rack is 24 inches deep, the nearest obstruction should be at least 60 inches from the wall behind it. | Allows users to face the rack, bend safely, and handle weights without crowding. |
| Two-rack back-to-back layout | 72 in minimum between rack backs or fronts | 36 in aisle + 36 in aisle = 72 in | Two racks that face away from each other need two separate 36-inch access zones. | Maintains independent access when both sides are used at the same time. |
| Two-rack face-to-face layout | Rack depth + 72 in + rack depth | D + 36 in + 36 in + D | With two racks that are each 24 inches deep: 24 + 72 + 24 = 120 in (304.8 cm). | Creates a clear central aisle and preserves access to both racks. |
| End-of-rack clearance | 36 in where people must pass around the rack | Extend the clear aisle around the rack end if the rack is not positioned against a wall or another fixed boundary. | A 48-inch-long rack in an open layout may require 36 inches of clearance at each accessible end. | Reduces pinch points and prevents users from cutting through lifting areas. |
| Rack capacity planning | Match capacity to the dumbbell set | Count the number of dumbbell pairs, then select a rack with equal or greater supported positions and load capacity. | A set with 10 pairs requires at least 10 suitable storage positions. | Prevents floor storage, uneven loading, and unnecessary reaching across other weights. |
| Weight-handling clearance | Keep the 36-inch aisle free of loose equipment | Do not place benches, plates, bags, or accessory stands inside the measured aisle. | A 36-inch aisle is not adequate if a bench reduces the usable passage to 24 inches. | The measurement must represent usable, unobstructed space rather than empty floor shown on a plan. |
| Floor measurement method | Measure finished, usable floor area | Measure between permanent boundaries and subtract columns, wall projections, doors, and other fixed obstructions. | Usable width = room width − column width − other permanent projections. | Produces a more accurate layout than measuring the room’s outside dimensions. |
| Metric conversion | 36 in = 91.44 cm = 0.9144 m | Inches × 2.54 = centimeters | 36 × 2.54 = 91.44 cm, commonly rounded to 91 cm. | Helps convert a floor plan or tape-measure reading between imperial and metric units. |
| Final layout check | Verify the route after installation | Place the rack in its intended position, open all nearby doors, and remeasure the actual clear aisle. | Confirm that doors, emergency routes, and adjacent training stations do not reduce the 36-inch passage. | Installation conditions can change the usable clearance from the original floor plan. |
Dumbbell storage is not only a space issue. It affects how quickly users can train and return equipment. The ACSM’s 2024 Worldwide Survey ranked traditional strength training fifth among global fitness trends. That finding supports a practical point: free-weight areas need clear, dependable access.
A one-tier rack offers the simplest reach. It suits home gyms, beginners, and lighter dumbbell collections. However, it usually requires more floor length.
A two-tier rack raises the upper row and creates better storage density. Users can see most handles without bending deeply. In a busy training room, that visual access can reduce searching and misplaced weights.
The Health & Fitness Association reported 72.9 million Americans used fitness facilities in 2023. More users can mean more frequent equipment changes. A two-tier design often balances access and capacity better than a single shelf. It is not always ideal for shorter users.
A three-tier rack stores the most weight in limited floor space. It works well where wall clearance and traffic paths are restricted. Yet the highest shelf may slow access, especially for smaller adults or heavier dumbbells.
I once favored maximum capacity and overlooked retrieval effort. That was a poor layout decision.
Measure shoulder height, aisle width, and dumbbell length before choosing. A rack should leave enough room for two people to pass safely. No density target is perfect. A slightly larger footprint may create a faster, safer workout area.
How to Choose the Right Dumbbell Rack?
A dumbbell rack must handle repeated loading, not just look substantial. During gym equipment inspections, I check the steel gauge before judging the frame. A lower gauge usually means thicker steel, but published millimeters provide clearer evidence. Ask for the gauge of shelves, uprights, and support brackets. Thin shelves can sag under a full dumbbell set. That failure may appear slowly.
Protective finish matters in busy, humid training rooms. A well-applied powder coating should cover welds, corners, and shelf edges evenly. Look closely for pinholes, rough overspray, or exposed metal. Sweat and cleaning chemicals can reach small defects. I once focused only on frame thickness and ignored a chipped edge near the handle area. That shortcut was wrong.
Stability depends on more than weight. Choose a rack with a wide footprint, strong welds, and adjustable leveling feet when the floor is uneven. Load it gradually and check for rocking, twisting, or shelf movement. Short shelves may also place heavy dumbbells too close to one side. Commercial warranty terms deserve the same attention. Confirm coverage for the frame, welds, shelves, finish, and replacement parts. Check whether labor and shipping are included. A residential warranty may not cover daily gym use. Read exclusions carefully. The warranty sounds reassuring, but unclear response times can create expensive downtime. Keep installation records and photographs; they may support a future claim.